How to Set Up a Home VPN Network
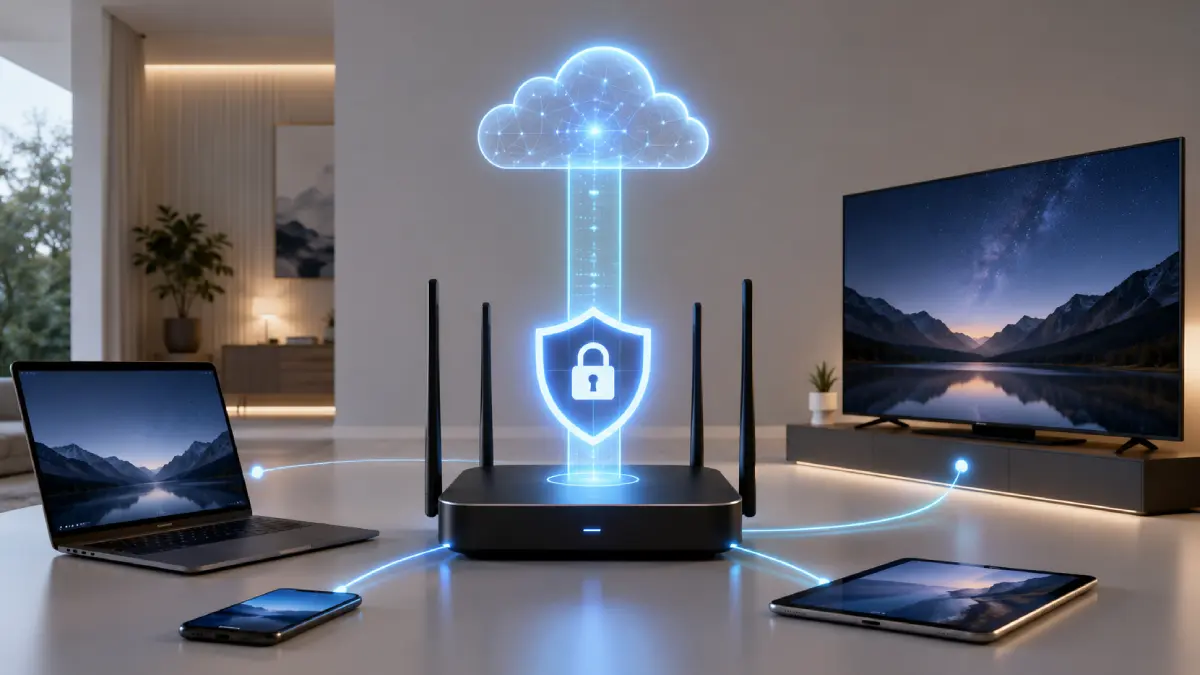
A home VPN is a private doorway back into your own Wi-Fi network when you are away from home. Instead of opening your NAS, Plex server, Home Assistant, security cameras or shared files to everyone online, you connect to the VPN first and then use those devices like you are sitting at home.
For most beginners, the best home VPN setup is WireGuard on a router, Raspberry Pi, NAS or small mini-PC. If your home IP address changes, add Dynamic DNS. Forward only the VPN port, make a separate profile for each phone or laptop, then test it from mobile data. If your ISP uses CGNAT or you cannot use port forwarding, choose a beginner-friendly mesh VPN such as Tailscale instead.
This guide is for the normal person version of “how to set up a VPN at home”: you want to reach your home network from outside, not become a network engineer. We will keep it practical: what to buy or enable, what settings matter, what words like WireGuard, OpenVPN, DDNS and port forwarding mean, and how to test it safely. If you want the visual version first, start with our interactive explainer on how a VPN connection works.
Home VPN setup checker: the beginner route
Not sure whether you need a router VPN server, Raspberry Pi VPN server, NAS VPN, WireGuard, OpenVPN or a no-port-forwarding option? Pick the closest answers. The tool runs in your browser and does not send your answers anywhere.
Choose the easiest safe home VPN network design
The aim is not to pick the most technical setup. It is to pick the simplest setup that lets you access your home network remotely without exposing private apps to the whole internet.
What a home VPN network actually does
A home VPN creates a private encrypted tunnel from your phone, laptop or tablet back to your house. Once it connects, your device can reach private home addresses such as 192.168.1.20, just like it can when you are on your own Wi-Fi.
The important part is this: a home VPN is mainly for remote access to your own network. A paid privacy VPN is mainly for sending your internet traffic out through a VPN company. They both use the word VPN, but they solve different problems. This is also why VPNs, proxies and Smart DNS services should not be treated as the same thing.
Access your NAS, file shares, Plex, Home Assistant, security cameras, smart home hubs, printers, lab servers and private dashboards when you are away.
You can also route normal browsing through your home IP address while travelling, but that is a bonus feature rather than the main reason to build a home VPN network.
A home VPN is not a commercial VPN with lots of countries and streaming locations. It normally exits through your own home broadband connection.
Best ways to set up a home VPN server
There is no single perfect home VPN setup. The beginner-friendly answer depends on your router, your ISP and what can stay switched on at home. Before you install anything, take a minute to choose a secure VPN setup rather than only choosing the fastest or cheapest option.
| Setup option | Best for | What you need | Beginner warning |
|---|---|---|---|
| Router VPN server | Easiest if supported | A router with WireGuard, OpenVPN or IPsec server mode | Only use current, maintained VPN options. Avoid old options such as PPTP. |
| WireGuard on Raspberry Pi or mini-PC | Best balance | An always-on Linux device, one port forward and one client profile per device | You must keep the device updated and protect the WireGuard keys. |
| OpenVPN on NAS or home server | Good compatibility | A NAS, server package or router app that supports OpenVPN | Some NAS packages are easy, but speed and setup quality vary by vendor. |
| Tailscale subnet router | Best with no port forwarding | Tailscale on an always-on device inside the home network | It is very beginner-friendly, but it is a mesh VPN service rather than a fully self-hosted VPN. |
| Paid VPN on router | Outbound privacy | A VPN provider account and a router that can act as a VPN client | This usually helps devices leave your home through a provider VPN. It usually does not help you connect back into your home network. |
First, check whether your router already has a WireGuard server. If it does, start there. If it does not, use a Raspberry Pi or small Linux box. If your ISP uses CGNAT or you cannot forward ports, skip the frustration and use Tailscale subnet routing.
How to set up a home VPN network step by step
These steps are written for beginners. The exact menus differ between Asus, TP-Link, Netgear, Synology, UniFi, GL.iNet, OpenWrt, pfSense and OPNsense, but the order is usually the same.
Choose one clear goal
Write down what you want to reach from outside the house: your NAS, a file share, Plex, Home Assistant, security cameras, a smart home bridge, a development server or your home IP address. This stops you opening random ports later.
Pick the easiest safe host
If your router has WireGuard server support, use that first. If not, use an always-on Raspberry Pi, mini-PC, NAS or home server. The VPN server must stay powered on whenever you want remote access.
Choose WireGuard unless you have a good reason not to
For a new home VPN setup, WireGuard is usually the simplest modern choice. Use OpenVPN if your router or NAS has better OpenVPN support, or use Tailscale if port forwarding is not possible.
Install or enable the VPN server
On a router, look for “VPN Server” in the admin page. On a Raspberry Pi or Linux box, install WireGuard or a helper such as PiVPN. On a NAS, use a maintained VPN server package from the vendor.
Create one client profile per device
Make a separate profile for your phone, laptop, tablet and each family device. Do not share one profile everywhere. If a phone is lost, you can revoke only that phone.
Route only what you need at first
For a beginner setup, start with access to your home network only, such as 192.168.1.0/24. Later, you can choose a full-tunnel home VPN if you also want normal internet browsing to go through your home IP.
Add Dynamic DNS if your home IP changes
Dynamic DNS gives your home a memorable hostname, such as yourname.example.net. Your VPN app connects to that name even if your ISP changes your home public IP address.
Forward only the VPN port
Forward the WireGuard or OpenVPN port from your router to the VPN server. Do not forward NAS, camera, Home Assistant, SMB, Plex admin or router admin ports just to “make it work”.
Test from outside your Wi-Fi
Turn off Wi-Fi on your phone, use mobile data, connect to the VPN, then open a private home device. Use our tools to check your public IP address and later check whether your VPN is working.
WireGuard home VPN vs OpenVPN home server
WireGuard is usually the first protocol to try for a new DIY VPN server because the configuration is small, performance is strong and mobile clients are straightforward. OpenVPN is older but still valuable because many routers, NAS devices and firewall distributions support it.
| Need | WireGuard | OpenVPN | Plain-English advice |
|---|---|---|---|
| Fast home VPN setup | Excellent | Good | Try WireGuard first if your router or server supports it. |
| Old router compatibility | Varies | Often better | OpenVPN may be the only server option on older consumer routers. |
| Mobile battery life | Strong | Depends | WireGuard is normally the smoother phone and tablet choice. |
| Simple client files | Simple | More moving parts | WireGuard configs are easier to review, but keys must be protected. |
| Existing NAS package | Depends on vendor | Common | Use the protocol your NAS supports securely and keeps updated. |
Dynamic DNS, port forwarding, CGNAT and home VPN access
The most common home VPN problem is not the VPN app. It is reachability. Your remote phone or laptop needs a way to find and reach the VPN server inside your house.
Use DDNS when your ISP gives you a public IP address that changes. Your client connects to the hostname, and the hostname updates when your home IP changes.
Forward one VPN port to the router, Raspberry Pi, NAS or home server running the VPN. WireGuard commonly uses UDP; OpenVPN commonly uses UDP or TCP depending on your config.
If your router does not have a real public IPv4 address, ordinary inbound port forwarding may fail. Ask the ISP for a public IP or use a no-port-forwarding VPN design.
If you have an ISP router plus your own router, put one device in bridge/modem mode or forward the VPN port through both layers to the real VPN server.
A hotel or café network using the same subnet as your home LAN can break access. Change your home LAN to a less common private range before it becomes painful.
Tailscale, ZeroTier and similar mesh VPNs make outbound connections from both sides, which can be easier where inbound connections are blocked.
Connect to your home VPN from Windows, Mac, iPhone, Android and Linux
Once the server is ready, the client side is usually the easy part. Install the correct app, import the profile for that device, then test on a network that is not your home Wi-Fi.
- Install the official WireGuard app, OpenVPN Connect app, router vendor app, NAS VPN client or mesh VPN client.
- Import only that device’s profile. Do not reuse the same private key or OpenVPN profile across every family device.
- Connect while still at home once and check that the app says connected.
- Turn off Wi-Fi, use mobile data or another network, then connect again.
- Open a private LAN address, such as your NAS, router, Home Assistant or camera dashboard.
- Use check whether your VPN is working as a final sanity check, especially if you are routing all traffic through home.
- Save emergency notes somewhere safe in case you replace your phone, reset the router or rotate VPN keys.
Home VPN security basics
A home VPN is safer than opening lots of app ports, but it is not a magic shield. A VPN controls the tunnel into your network. A firewall controls what traffic is allowed through. If those ideas feel similar, read the difference between a VPN and a firewall before you change router rules.
- Use WireGuard, OpenVPN or another maintained VPN option. Avoid obsolete protocols such as PPTP.
- Update the router, NAS, Raspberry Pi, firewall or home server before exposing the VPN port.
- Create one profile per device so lost phones and retired laptops can be revoked cleanly.
- Protect private keys and exported profiles. Anyone with a valid profile may be able to reach your home LAN.
- Start with home-network-only access before trying a full-tunnel setup.
- Keep router admin, NAS admin, cameras, SMB and Home Assistant off the public internet.
- Use strong admin passwords and multi-factor authentication wherever your router, NAS or mesh VPN account supports it.
- Remove old port forwards after the VPN is working. Fewer open ports means fewer surprises later.
- Write down what you changed, including the VPN port, DDNS name and where the backup profiles are stored.
Home VPN troubleshooting: connected but no LAN access?
Most home VPN failures fall into a small group of routing, firewall, DNS or ISP problems.
| Problem | Likely cause | What to check |
|---|---|---|
| VPN will not connect from outside | Wrong public IP, missing DDNS update, closed port, CGNAT or double NAT | Check WAN IP, DDNS record, port forward, ISP router mode and whether your ISP gives you a public address. |
| VPN connects but cannot reach NAS or cameras | Missing route, firewall block or client subnet not allowed | Check allowed IPs, server firewall, NAS firewall, router ACLs and the exact home subnet. |
| Works on mobile data but not from hotel Wi-Fi | Subnet conflict or network blocking the VPN port | Change your home LAN away from common ranges such as 192.168.0.0/24 and 192.168.1.0/24, or try another VPN port/protocol. |
| Can access IP addresses but not device names | DNS is not routed or local hostnames are not resolvable remotely | Set a DNS server reachable over the VPN, use local DNS records, or save important devices by IP. |
| Internet stops while VPN is connected | Full tunnel route without NAT, DNS or forwarding on the server | Use split tunnel for LAN-only access, or enable forwarding and NAT for full-tunnel browsing through home. |
| Speeds are much slower than expected | Router CPU limit, home upload limit or weak Wi-Fi at either end | Test on wired home internet, check upload speed, compare WireGuard and OpenVPN, and consider a stronger router or mini-PC. |
Home VPN server vs VPN provider on your router
These two ideas often get mixed up, so here is the beginner version. A home VPN server lets you connect back into your home network. A VPN provider on your router sends devices in your house out through a commercial VPN company. Both can be useful, but they are not the same project.
You want remote access to your NAS, home server, Home Assistant, smart devices, local files, cameras or your home broadband IP address.
You want outbound privacy from home devices, shared VPN IPs, country selection, public Wi-Fi protection or a VPN router for streaming and everyday browsing.
For router-wide outbound VPN, compare providers by router support, WireGuard/OpenVPN config files, speed, device limits and price.
Home VPN network FAQs for beginners
Can I set up my own VPN at home?
What is the easiest way to set up a home VPN network?
Do I need a static IP for a home VPN?
Do I need port forwarding for a VPN server at home?
Should I use WireGuard or OpenVPN for home VPN setup?
Can I access my NAS remotely with a VPN?
Can I use a home VPN for Plex, Home Assistant or security cameras?
Why does my home VPN connect but not access LAN devices?
Can I set up a home VPN without port forwarding?
Is a home VPN free?
Is a home VPN safe?
Will a home VPN hide traffic from my ISP?
Technical sources
These references support the protocol, router and remote-access distinctions used in this guide.